It took a couple of attempts to arrange the shapes properly so that you can read it all clearly, but I think it worked out well when I had it all arranged properly...
Alison Gibbon/Graphic Design
Monday, 14 March 2011
Final Poster
For my final poster I chose a black background to make the shapes and text really stand out, I arranged the shapes together so you could read the exhibition and venue clearly but so that the shapes weren't just spread out in a long line...
It took a couple of attempts to arrange the shapes properly so that you can read it all clearly, but I think it worked out well when I had it all arranged properly...
It took a couple of attempts to arrange the shapes properly so that you can read it all clearly, but I think it worked out well when I had it all arranged properly...
Working Towards My Poster
To create my poster for the celebration of 100 years of G F Smith I needed to develop on my hanging piece to create a new look. I decided to tone down my final piece and keep the poster even simpler. As my final piece is fairly basic and simple I thought it would look a bit odd if my poster was filled with complicated paper models, so I decided to just use one of the simple three shield shapes on its own rather than attaching a few together...
For my poster I decided to use four of these and to make them a part of the text on the poster. On one of the shapes I cut 100 in the centre of the shapes instead of the usual cut out section...
I then wrote the rest of the title of the exhibition across two more shapes and then Design Museum on the fourth. For the date I decided that as it was a celebration of paper it would be fun to use paper for the rest of my text instead of using a digital font, so I cut the date out of pink card and placed it underneath the four shapes. This includes paper in the title as well as showing and image of what the exhibition is about...
For my poster I decided to use four of these and to make them a part of the text on the poster. On one of the shapes I cut 100 in the centre of the shapes instead of the usual cut out section...
Final Hanging Piece
After looking through my experiments I decided the fastening I liked best was the three of the three shield shapes fastened together by the side. I decided to keep it just down to the three fastened together and made four of these shapes, I planned to suspend them with thin string from each other, but with them facing alternate ways, so the top one would face up, the second one down etc...
This is what my final outcome for my hanging piece looked like...
I quite liked this outcome, it was difficult to get a good photograph of it as it's a hanging piece it was constantly moving, but I think it has worked well.
I quite liked this outcome, it was difficult to get a good photograph of it as it's a hanging piece it was constantly moving, but I think it has worked well.
First Attempt For A Final
I decided to experiment further with the last fastening of attaching three together by the side, to continue the experiment I decided to see what would happen if I kept attaching these three shield shapes together by the sides, I started by attaching three together, one behind and one underneath to see if this would give me bigger more interesting effect...
I then started adding more of the three shield shapes in by attaching them to the side of another shape where they would fit, it started to look quite interesting and carry off my floral theme a bit with some of the inspiration from atoms too...
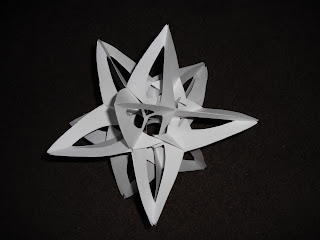
I decided to fit in as many as I could to make a big kind of spiky ball shape from this, I thought this could look like a whole atom or the head of a flower. When I had attached all I could fit I came out with this outcome...
I didn't really like it in the end, I think I got a bit too carried away with it and attached too many so it looked a bit messy and crowded. When I showed Richard Sweeney he said it reminded him of a radiolarian, which is a minute sea creature so I decided to look into this...
I think it does look similar, this would have been a great thing to look into before I started my final so I could of made a better plan of how to build it rather than just seeing what would happen...
However I'm still not happy with this as my final piece so I'm going to continue with experiments...
Fastenings
Continuing with the last experiment I did in the workshop of the three shield shapes together I decided to experiment with ways of fastening some together...
To start this experiment I made three separate shapes made up of three shield shapes and experimented with ways of balancing and attaching them together...
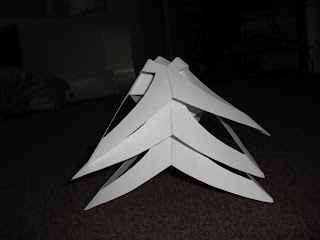
I started by piling them on top of each other but face down, making them three layers high. I quite liked this, I think it looked quite interesting but it was a bit difficult to see where I could go with this fastening as it seemed quite limited...
I then tried doing it the other way round, by balancing them on top of each other facing upwards, this actually looked a lot better and more interesting, it continued my floral theme quite well, but again it seemed quite limited as to what I could do with it after piling a few on top of each other...
To try and make the fastening more creative and interesting I tried fastening them together in alternate ways, so there would be one facing up with one facing down on top of it, and then one facing upwards again on top of that one, continuing for a pattern. This fit in well for the theme of repeat, however when I tried to fasten them together it was really difficult and almost impossible to get them to stay in place without moving or falling off...
Moving on from the idea of piling these shapes on top of each other I decided to see what effect it would create if I fastened them next to each other on the sides of the shapes. This turned out to be much easier to hold them together without them moving or falling off, this would then allow me to experiment further with this fastening to create a more interesting piece for my final...
To start this experiment I made three separate shapes made up of three shield shapes and experimented with ways of balancing and attaching them together...
I started by piling them on top of each other but face down, making them three layers high. I quite liked this, I think it looked quite interesting but it was a bit difficult to see where I could go with this fastening as it seemed quite limited...
I then tried doing it the other way round, by balancing them on top of each other facing upwards, this actually looked a lot better and more interesting, it continued my floral theme quite well, but again it seemed quite limited as to what I could do with it after piling a few on top of each other...
To try and make the fastening more creative and interesting I tried fastening them together in alternate ways, so there would be one facing up with one facing down on top of it, and then one facing upwards again on top of that one, continuing for a pattern. This fit in well for the theme of repeat, however when I tried to fasten them together it was really difficult and almost impossible to get them to stay in place without moving or falling off...
Wednesday, 16 February 2011
Workshop 3
In the third workshop I spent time planning out a design and experimenting with ways of making a floral based design...
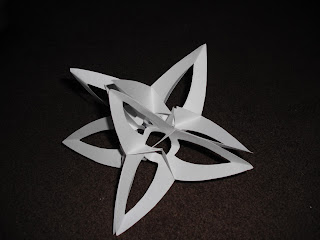
We were given a large piece of paper so I decided to cut out a series of the same shape, a kind of shield shape, I cut out a few rows of this shape, cutting one out and using it as stencil so the shapes were the same and the same size...
I then cut a small shape out of the center of the shield shapes and folded the corners in to give the shape some 3D...
Next I put two together to see how I could attach the two corners together to make a bigger over all shape and to see how it could also become a repeated pattern...
I stuck 4 together in this way, but joined the corner of the first and fourth together to make a round shape, in the style of a flower, I then used the small sections I cut out of the shields and attached them behind the join where the two shields were joined to give the idea of leaves or extra petals...
I decided that this design gave off the floral idea as I wanted but the shapes were too big making the overall shape too big which made it flimsy and a bit too spread out for what I wanted, so I experimented with just attaching 3 shields together...
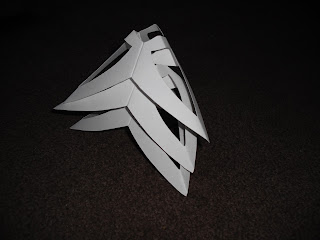
Finally I made 3 of these overall shapes that were made up of 3 shields and experimented with how they could fit together to make a more floral design and to also see how they could be repeated or made into a repeating pattern...
I liked this outcome so I think I'm going to try further experiments with it and more towards this design for my final piece...
Research - Primary Inspiration
After speaking to Richard Sweeney and showing him my ideas and designs he suggested that I might be interested in looking at Islamic Architecture, Moorish Architecture and Escher as their work is down the same path as where my inspiration seems to be taking me...
I started with Islamic Architecture...
I liked these pieces, I like the detail in them and how they are repeated patterns and designs without being too geometric or boring, I also like the use of colour and how the designs are fairly floral and illustrative...
Then I looked into the work of Escher...
I found these pieces quite interesting, I like how he has made patterns up using the idea of nature and animals, but the focus is more on the pattern than the animals. I also think it's interesting how he has used different shapes to make the pattern too, he hasn't just made his designs fill a box, he's experimented further...
After looking at these forms suggested to me I also decided to look into flowers and floral design as this seems to be the direction I'm going for and these forms fit into that path too...
I would like to experiment with designs like these to see how I could manipulate the paper to a similar effect and see how the outcome would turn out...
I also decided to look into atoms, I think that atom diagrams have a similar shape to a simple flower.
I thought this would be interesting to look into as I would be able to manipulate the paper to combine both floral and atom like shapes to create an interesting and unusual shape...
I started with Islamic Architecture...
I liked these pieces, I like the detail in them and how they are repeated patterns and designs without being too geometric or boring, I also like the use of colour and how the designs are fairly floral and illustrative...
Next I looked at Moorish Architecture...
These pieces are quite similar to Islamic Architecture, I like patterns and again I think they look quite floral with the repeated pattern that isn't too geometric, the colours are more basic and not as in your face but I think they still work well and make these designs interesting...
These pieces are quite similar to Islamic Architecture, I like patterns and again I think they look quite floral with the repeated pattern that isn't too geometric, the colours are more basic and not as in your face but I think they still work well and make these designs interesting...
Then I looked into the work of Escher...
I found these pieces quite interesting, I like how he has made patterns up using the idea of nature and animals, but the focus is more on the pattern than the animals. I also think it's interesting how he has used different shapes to make the pattern too, he hasn't just made his designs fill a box, he's experimented further...
After looking at these forms suggested to me I also decided to look into flowers and floral design as this seems to be the direction I'm going for and these forms fit into that path too...
I would like to experiment with designs like these to see how I could manipulate the paper to a similar effect and see how the outcome would turn out...
I also decided to look into atoms, I think that atom diagrams have a similar shape to a simple flower.
I thought this would be interesting to look into as I would be able to manipulate the paper to combine both floral and atom like shapes to create an interesting and unusual shape...
Subscribe to:
Comments (Atom)


